Users
Users Tab
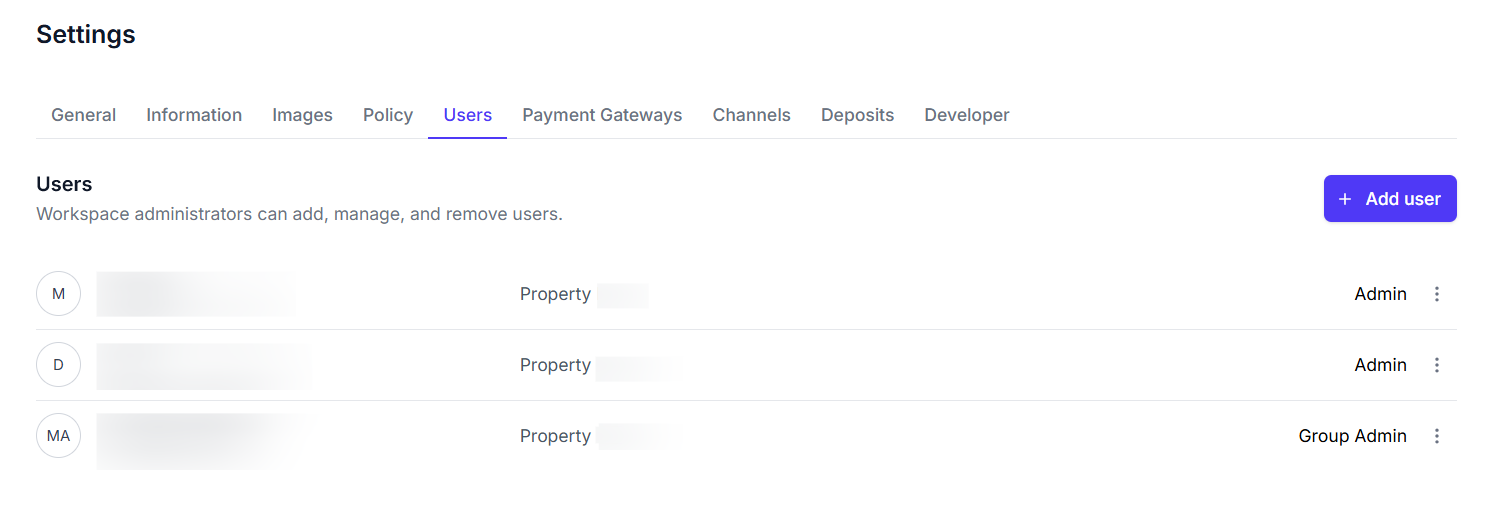
The "Users" tab provides workspace administrators with the essential tools to add, manage, and remove individuals who have access to your organization's properties and data. It ensures secure and granular control over user permissions.
Key Features
-
User List Table: This central overview displays all registered users in your workspace.
- User Details: Shows the user's Name and Email for easy identification.
- Property Assignment: Indicates the specific property or properties the user is associated with (e.g.,
Property Demo). - Role: Defines the access level assigned to each user (e.g.,
Admin,Staff,Viewer,Group Admin). - Action Menu: A three-dot icon (
...) next to each user entry, providing options such asEdit Userfor managing their details.
-
+ Add user Button: A prominent button positioned at the top-right, used to initiate the process of creating a new user account.
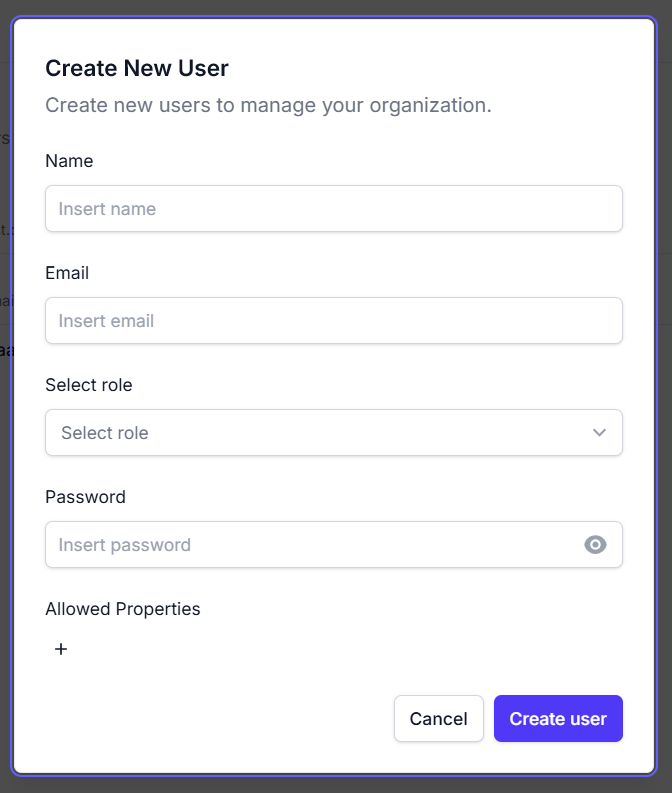
- User Management Form (Create/Edit Modal): This modal form appears when either adding a new user or editing an existing one, facilitating data input and modification.
- Name Field: An input field for the user's full name.
- Email Field: An input field for the user's email address.
- Select Role Dropdown: A dropdown menu to assign the desired permissions role to the user.
- Password Field: (Only visible for new user creation) An input field to set the initial password, accompanied by a visibility toggle.
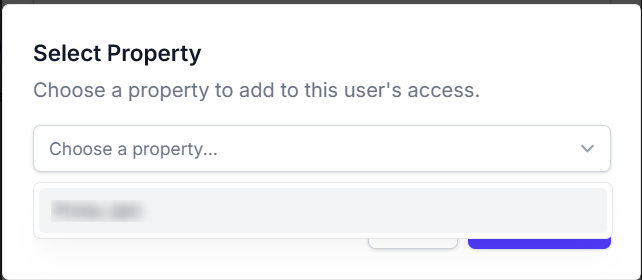
- Allowed Properties Section: An area where you can explicitly assign which properties the user is authorized to access, ensuring data security and segregation.
- Control Buttons: Includes
Cancelto discard changes andCreate user/Update userto save the respective form.
How to Use
- Navigate to the "Settings" section and select the "Users" tab.
- Review the User List Table to quickly see all current users, their assigned properties, and their respective roles.
- To add a new user:
- Click the + Add user Button.
- Complete the Name, Email, Select Role, and Password fields in the "Create New User" form.
- Utilize the Allowed Properties Section to grant access to specific properties.
- Click Create user to finalize the new account.
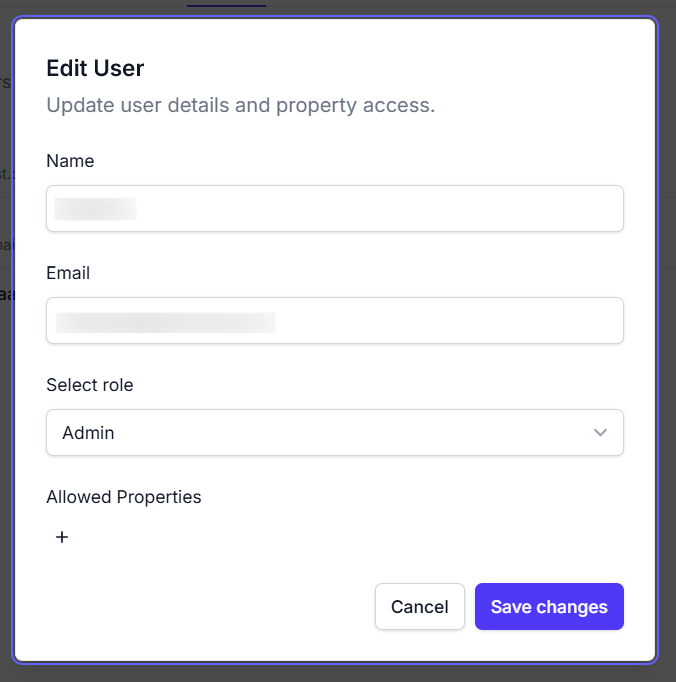
- To edit an existing user:
- Locate the desired user in the User List Table.
- Click the Action Menu (three-dot icon) next to their entry and select
Edit User. - Modify the Name, Email, Select Role, or Allowed Properties as required.
- Click Update user to save your changes. Note: The user's password cannot be changed through this "Edit User" form.
- Important: Users assigned the
Group Adminrole have elevated permissions and their profiles cannot be edited through this interface.